Don't hesitate to contact when you need us!
Why does the aerospace industry prefer horizontal turning? Uncovering the secrets of high-precision turbine disk machining technology
 2025.08.06
 Industry News
Content
1. Why does the aerospace industry prefer horizontal turning centers?
Gravity advantage: avoid deformation of large workpieces
Vertical turning problems: When processing heavy workpieces (such as turbine disks with a diameter of more than 1.5m), the weight of the workpiece will cause deformation during clamping, affecting the roundness (usually exceeding the tolerance by more than 0.02mm).
Horizontal solution: The workpiece is placed horizontally, the gravity is evenly distributed, and the roundness can be controlled within 0.005mm with the hydraulic center stand.
Chip management: prevent high-temperature alloys from sticking to the tool
Aerospace material challenges: nickel-based high-temperature alloys are prone to long curled chips when cutting, and vertical processing is prone to entanglement with the tool.
Horizontal advantages: Chips naturally fall to the chip groove, and with high-pressure cooling (70Bar), the tool life is increased by 40%.
Stability: Vibration resistance is increased by 3 times
Vibration comparison:
|
Vibration source |
Vertical turning amplitude |
Horizontal turning amplitude |
|
Spindle unbalance force |
0.015mm |
0.005mm |
|
Cutting force fluctuation |
0.008mm |
0.003mm |
Result: The horizontal structure has higher rigidity and is suitable for fine turning (Ra 0.4μm) and super fine turning (Ra 0.1μm) of aviation parts.
Multi-task machining: complete turning and milling in one clamping
Typical process: turbine disc needs to complete 20+ processes such as turning outer circle → milling mortise and tenon → drilling cooling holes.
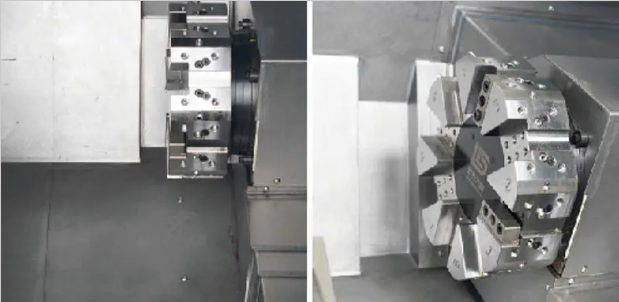
Horizontal solution: equipped with B-axis power turret to realize turning, milling and drilling composite machining, with position accuracy of ±0.01mm.
2. Horizontal Turning Center Troubleshooting Guide
Mechanical system troubleshooting
- Abnormal spindle vibration/noise
Possible causes:
Spindle bearing wear (common in equipment with more than 10,000 hours)
Dynamic balancing failure (tool/workpiece not calibrated)
Coupling loose or damaged
Solution:
Vibration value detection:
Use a vibration analyzer. If the axial vibration is greater than 2.5mm/s, the bearing needs to be replaced
Dynamic balancing calibration:
G6.3 dynamic balancing is performed after the tool is clamped (residual imbalance <1g·mm)
Check the coupling:
The tightening bolt torque must meet the specification standard (such as ISO 4017 M12 bolts need 90N·m)
- Machining size is unstable (±02mm or more out of tolerance)
Possible reasons:
Ball screw reverse clearance is too large (>0.01mm)
Guide rail wear causes motion drift
Thermal deformation (spindle temperature rise>15℃ not compensated)
Solution:
Compensate reverse clearance:
Enter the measured clearance value in the CNC system (such as FANUC parameter #1851)
Check guide rail accuracy:
Measure with laser interferometer, straightness>0.01mm/500mm needs to be scraped
Thermal compensation strategy:
Preheat the spindle for 30 minutes, or enable automatic compensation of temperature sensor
Electrical and control system failure
- Servo drive alarm (overload/encoder error)
Common alarm codes:
ALM414 (overload): mechanical jamming or gain parameter mismatch
ALM513 (encoder fault): signal line interference or encoder damage
Processing steps:
Check mechanical resistance:
Turn the lead screw manually, the resistance should be <5N·m
Detect encoder:
Check the A/B/Z phase signal waveform with an oscilloscope to see if it is complete
Adjust servo parameters:
Reduce position loop gain (such as from 5000 to 3000)
- Turret tool change failure
Fault manifestation:
The tool disc cannot be locked (hydraulic pressure <40Bar)
Tool number confusion (PMC signal loss)
Solution:
Check the hydraulic system:
Test the tool change pressure and adjust the pressure reducing valve to 60Bar
Clean the positioning pin:
Clean the pin hole with kerosene and apply MoS₂ grease
Reset the tool number signal:
Re-align the turret origin (refer to the "turret indexing adjustment" section of the machine tool manual)
Cooling and auxiliary system failure
- High-pressure coolant leakage
Location of leakage point:
Aging of rotary joint seal (lifespan of about 2 years)
Damage of pipe joint O-ring
Emergency treatment:
Temporary plugging:
Wrap the leak with oil-resistant sealing tape
Replacement of seal:
Use fluororubber material (temperature resistance above 200°C)
- Chip conveyor stuck
Root cause:
Long chips wrapped (especially aluminum alloy/stainless steel)
Insufficient chain tension (droop > 10mm)
Preventive measures:
Optimize chip breaking:
Use blades with chip breaker grooves (such as Mitsubishi UE6110)
Adjust chain:
Tension according to manual standards (such as 50N preload for a chain with a pitch of 100mm)
3. Systematic maintenance suggestions for horizontal turning centers
Daily maintenance
- Check before starting the machine
Lubrication system: confirm the oil level of guide rail oil and spindle oil.
Air pressure detection: check the air source pressure (≥0.6MPa) to ensure that the fixture and turret operate normally.
Coolant status: observe the concentration (5%~8% emulsion is recommended), and the filter is not blocked.
- Monitoring during operation
Spindle temperature: During continuous processing, the temperature rise should be less than 15℃ (abnormal temperature rise may indicate bearing wear).
Abnormal noise: monitor whether there is abnormal noise when the spindle, turret, and guide rail move.
- Cleaning after shutting down
Chip cleaning: remove metal chips on the workbench, guide rail, and chip conveyor (to avoid accumulation and corrosion).
Protective cover wiping: clean the guide rail protective cover with non-woven cloth to prevent debris from scratching the sealing strip.
Weekly maintenance
- Mechanical system inspection
Guide rail and lead screw:
Manually move each axis to feel whether the resistance is uniform (abnormal resistance may indicate that the preload force has failed).
Check whether the guide scraper plate is damaged (replacement cycle: 6~12 months).
Turret positioning accuracy:
Use a dial gauge to detect the turret repeat positioning error.
- Hydraulic and pneumatic system
Hydraulic pressure test:
Turret locking pressure (usually 60~80Bar), if it is lower than 40Bar, it needs to be repaired.
Air line drainage:
Drain the condensed water in the air filter to prevent it from entering the solenoid valve.
- Electrical system
Cable status: Check whether the servo motor and encoder cables are worn or bent.
Ground resistance: Measure the ground resistance of the machine tool (required ≤4Ω).
Monthly in-depth maintenance
- Accuracy detection and compensation
Reverse clearance detection:
Use a laser interferometer to measure the reverse clearance of each axis (allowable value: ≤0.01mm).
Enter the compensation value in the CNC system (such as FANUC parameter #1851).
Geometric accuracy calibration:
Check the verticality of the spindle and the worktable (≤0.01mm/300mm).
- Cooling system maintenance
Replacement of high-pressure pump filter element:
The filter element of the high-pressure cooling system (70Bar) should be replaced every 3 months.
Pipeline flushing:
Use alkaline cleaning agent (pH=9~10) to circulate and flush the cooling pipeline to prevent bacterial growth.

 English
 中文简体
中文简体 русский
 Español
 عربى
عربى
